Table of contents
Installing Working Papers
Downloading the installation files
If you forgot your password or username, you can easily recover it by clicking on
forgot password? at the bottom of the login page
You can download Caseware Working Papers from our download portal: Download portal
The following 2 files should be downloaded and installed in the following order:
-
WP_2025.00.164.06_BelgiumProtSyncx64.zip

- WPWebView2Update.exe

-
CNCT_2025.00.003.zip (Only available if purchased)

Installation
Working Papers 2025
It is possible that your PC needs to install additional Microsoft packages. If this is the case, then the installer will show a popup where you can click "install" to install them automatically.
Unzip WP_2025.00.111.16_BelgiumProtSyncx64.zip and double click the setup.exe file to start the installation.
If the following screen regarding the installer coordinator appears during the installation, you can close it by clicking 'Cancel'

Click "Next" on the first screen and accept the term of agreement in the second screen and click "Next" again.
Ignore the screen shown below and click "Next"

When asked for an installation folder, its best to keep the path the default one.
As some of the legacy documents require Caseware Working Papers to be installed in the default location. Choosing a different location can cause some documents to not function properly.

It is important that all required ports are open. Open the port by marking the checkbox and click "Next".

Click Install to begin the installation

Caseware Working Papers is now succesfully installed, you can close the installer by clicking "Finish".

Install the Web2View Patch
- Close all instances of Working Papers and CaseView.
- Execute WPWebView2Update.exe
- Click Next

- Accept the Master Product & Services Agreement and click Next.

- Review the installation folder. The default folder is C:\Program Files (x86)\Caseware.

- If the installer detects multiple versions of Working Papers, select the folder for the version you want to update.
- Click Install

Office Connector
The connector is only available for users who have purchased this add-on.
Install Connector 2025
Unzip CNCT_2025.00.003 and double click the ConnectorSetup.exe file to start the installation.
![]()
Click "Next" on the first screen and accept the term of agreement in the second screen and click "Next" again
Then make sure the connector is ticked on and click "Install"

The connector is now successfully installed, you can close the installer by clicking "Finish"

Activating your license
Types of licenses
There are 2 types of licenses, Network licenses and Standalone licenses
1. Network licenses are used for server installations or bigger firms who have access to an application server where all the users are in the same network as the server. (The use of a VPN is allowed)
If the license you have received is in the format *E ABC898898........exclusive , then you have a network license and can continue to step Activating a Network License
2. Standalone licenses are used to activate Working Papers when there is no access to a server. This type is used the most for installations on desktops/laptops
If the license you received is similar to AA11111BB1C1234DA86A6 you have a standalone license and can follow step Activating standalone licenses
Activating a standalone license
You should have received an e-mail with the title "Caseware Working Papers 2025".
In this e-mail you will find your license code. The same license is used to register all installations.
When opening Working Papers a popup will show asking to activate your license:
Click Register Now.

In the next screen select Stand alone and click Register Now.

In the screen that follows, click Next.
Copy your license code in the first field and fill in your full name and email address and click Next.
It's important to fill in these fields correctly as these are used to identify you when a reinstallation is needed.

Choose Register automatically over the internet and click Next again.

Activating a Network License
If you are performing an upgrade and have already used a previous version of Working Papers you can skip to step 3.2 Existing installations
New License manager installations
In order to generate your license code, we need your unique locking code and server name.
Use the Windows Search Bar to open the application Get locking Code

Or you can navigate to C:\Program Files (x86)\CaseWare International\Server Tools in the File Explorer and manually run cwechoid.exe as seen below:

This will open the necessary license info, copy and send both as text to : support@caseware.be

If your servername displays as No-net, then please continue to Troubleshooting No-net and try again.
We will then generate your license code and send it back to you.
After you received the license code, you can continue to step 3.2 Existing installations
Existing installations
Use the Windows Search Bar to open the application License Manager

Or you can navigate to C:\Program Files (x86)\CaseWare International\License Administration in the File Explorer and manually run WlmAdmin.exe as seen below:

In License manager, expand Subnet server and right click on your server name
Choose Add Feature ➜ From a string ➜ To server and its File
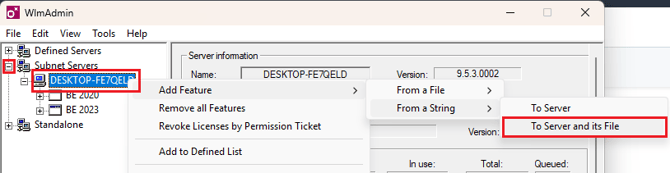
Copy and paste your license code in the field provided and click Add

The license is now correctly added to the license manager, you may now close the License manager.
It is possible that you receive error 88, if that is the case continue to Troubleshooting error 88
Troubleshooting
4.1 Error 88 or No-net as server name
Sometimes the license manager has difficulty finding the server name. In this case we need to add the server name to the environment variables.
Use the Windows Search Bar to open SystemPropertiesAdvanced.exe

Then go to Advanced ➜ Environment variables...

Now add your server name as a value to the to the LSHOST Variable, and click Ok

Now you can try again to add the license code to the license manager.
Installing the WinAcc (Corporate/Consol) Template
In this article we will be installing version 7.8.1, but the latest version will be communicated through email when it is released!
Download the Installation Files
- Navigate to https://corp.filesanywhere.com/PRAGMATOOLS/ and login with the credentials that were shared with you.
If you forgot your password or username, you can easily recover it by clicking on
forgot password? at the bottom of the login page
If you use a Corporate or Consolidation WinAcc Template, you will need to download and execute
WinAcc Corporate x.x.x
or WinAcc Consol x.x.x
- Download the installation file for the newest version of WinAcc, it will be the only file available in this folder

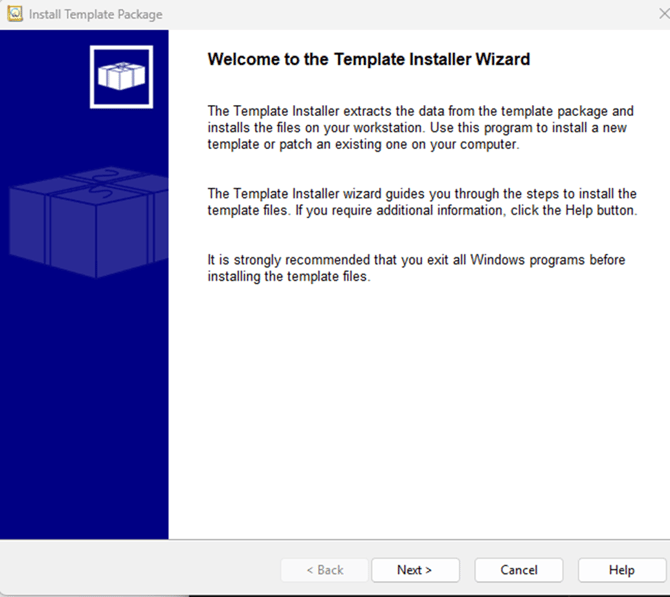
Installation
- Go to your Downloads Folder and execute WinAcc x.x.x, which you downloaded in the previous step
![]()
- Click Next on the following step
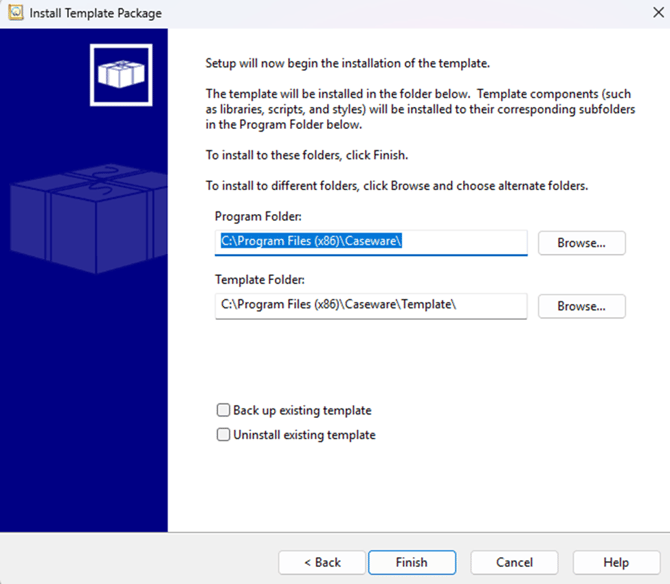
- It's best to keep the default paths for the Program and Template Folder, but you can change this if necessary. Then click finish.
If you don't have the BizTax Component installed yet, you will see the following popup
You can click on OK and then follow the installation steps for BizzTax
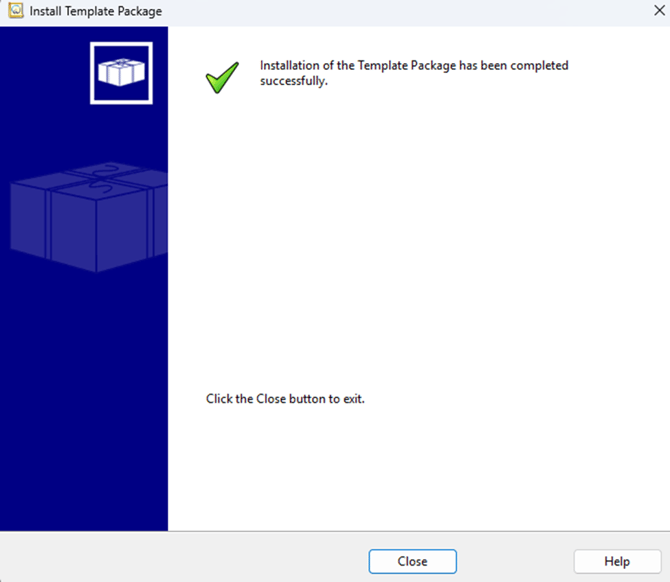
- Once the installation has completed, you may close this window
Check the WinAcc version
- To make sure the correct version was installed, we can can check the version in Working Papers
Open Working Papers and navigate to Templates

- Here you will find the currently installed Templates. Please select WinAcc and choose Properties
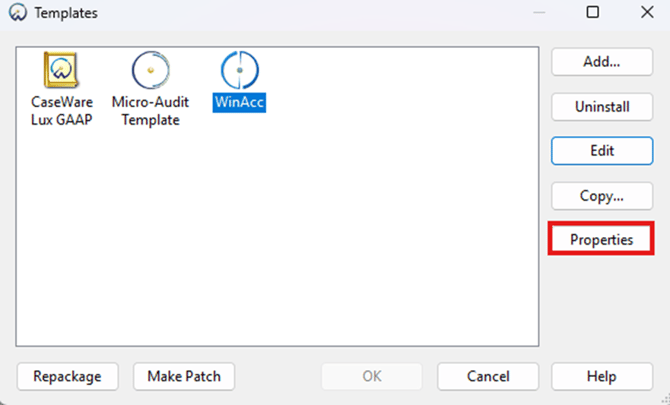
- You will find the installed WinAcc version here

If the version doesn't match to the version you downloaded, please try the upgrading steps again or contact our Support Team!
Install the Biztax Component
This step is only necessary if you encountered the following pop up during the WinAcc installation! Otherwise, this can be skipped

- Enter the Andere componenten subfolder on Files Anywhere and download the latest version of the Biztax Component
In this article we will be installing version 2025, but only latest version will be available to download!

- Go to your Downloads Folder and execute the WinAcc xxxx Biztax Component, which you installed in the previous step

- During the installation process you will see multiple windows.
You can select Next on each of them to progress the installation - Press Install to start the Installation

- Once the installation has finished, you can press Finish
