To get started, sign in to your firm’s Extractly site, using the link received in an activation email from Extractly. As a Firm Administrator, you’ll need to complete the following tasks before your team can begin using Extractly:
Activate the Firm Admin account
Activating your Firm Admin account is the starting point to set up Extractly for your firm.
To activate your Firm Admin account:
-
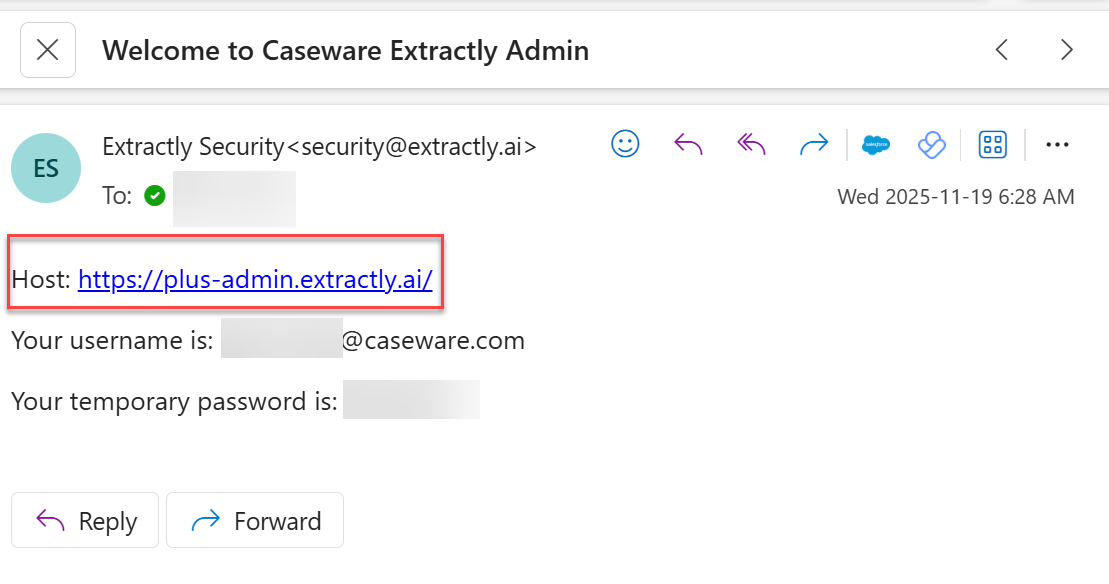
As the designated Firm Admin, you receive an activation email from Extractly containing a link to the Extractly admin portal.
-
Take note of the activation code.
-
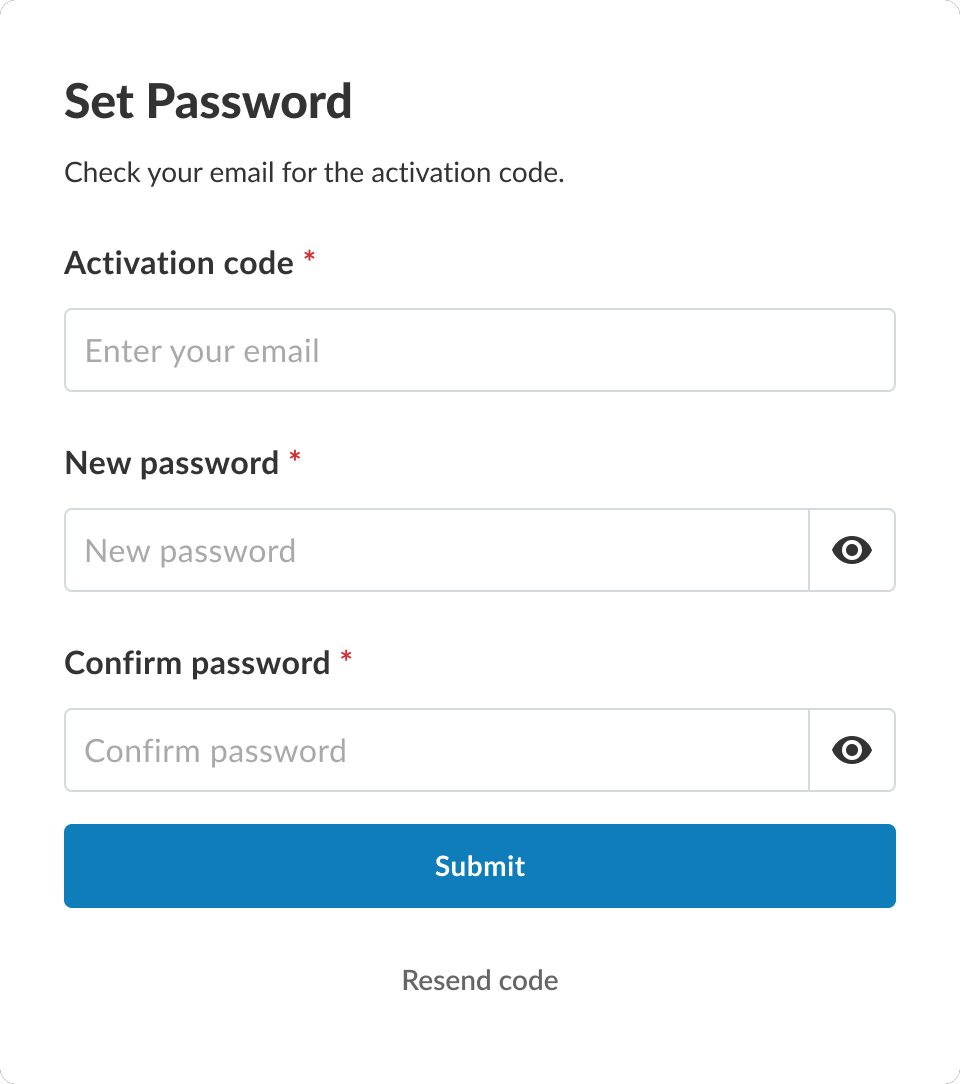
Select the admin portal activation link. The Set password dialog appears.
-
In Activation code, enter the activation code from your activation email.
-
Specify a new, secure password and confirm it.
-
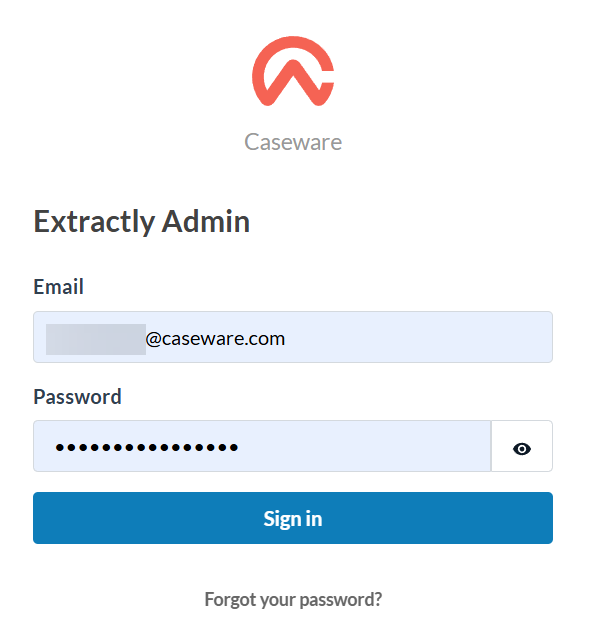
Select Submit. The Extractly Admin dialog appears with your user name and password prefilled.
-
Select Sign in.

Notes:
- If you have not received an activation email, check spam or contact support@caseware.be.
- Only one firm admin is provisioned initially.
Install Extractly for your firm
You can deploy Extractly to all users in your firm through the Microsoft 365 Admin Center. Or staff users can add Extractly to their own Excel environment from the Office Add-ins Store. To learn more, see Get started – Staff.
To install Extractly for your firm:
-
Sign in to the Microsoft 365 Admin Center at https://admin.microsoft.com/.
-
Go to Settings | Integrated apps.
-
Deploy the Extractly add-in. See Deploy an Office Add-in using the admin center for more information.
Note: Users may need to restart Excel or install the latest Office Updates to see Extractly in the ribbon.
Add and manage users
As a firm admin, you manage user access in Extractly by configuring Entra ID integration with your organization’s Tenant ID, then using the admin portal to add users, assign roles, and control permissions as needed.
Configure Microsoft Entra ID integration
-
Ensure Tenant ID authentication is configured.
-
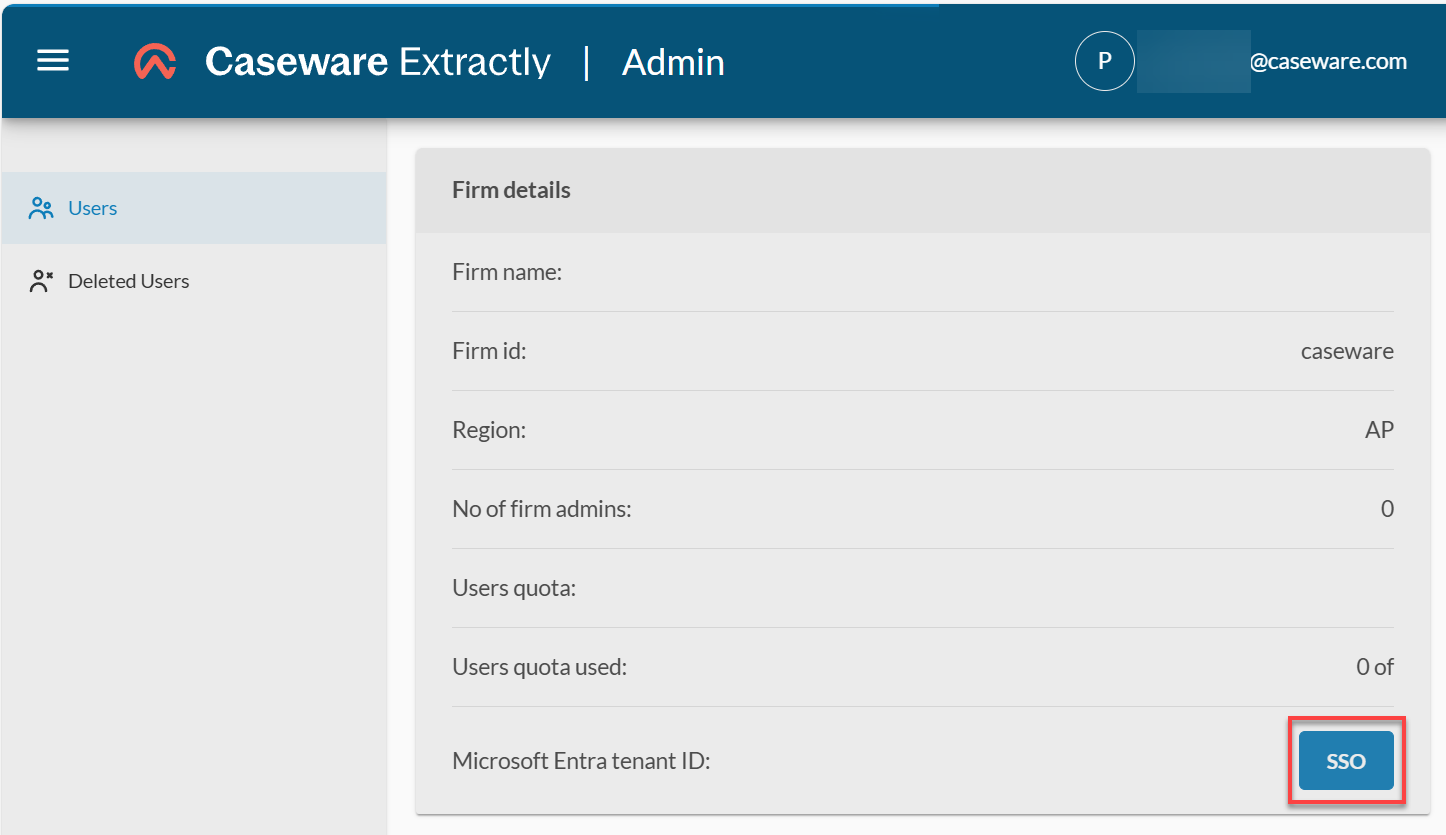
Set up Extractly to integrate with your organization’s Entra ID (Microsoft identity provider) using your Tenant ID: On the Users tab, in the Firm details section, locate the SSO button and select it.
-
-
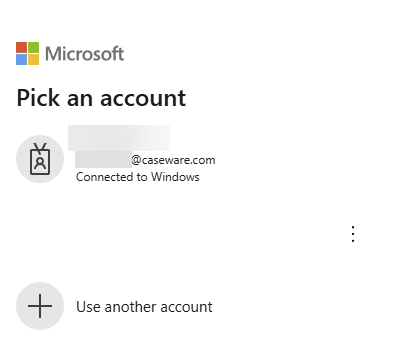
Select your Microsoft account. The tenant ID for your organization is automatically retrieved.
-
Users log in with organizational credentials.
-
Staff members access Extractly using their existing company user names and passwords.
-
Users are auto-added to the user list in the Extractly admin portal.
-
Upon first login, users are automatically listed in the List of users section.
-
-
Assign roles as needed in the Extractly admin portal
-
Review the user list and assign appropriate roles and permissions directly within the portal.
-
Set up a firm admin user
Firm admin users can add and manage Extractly users and view usage analytics.
To add a firm admin user:
-
Go to Users.
-
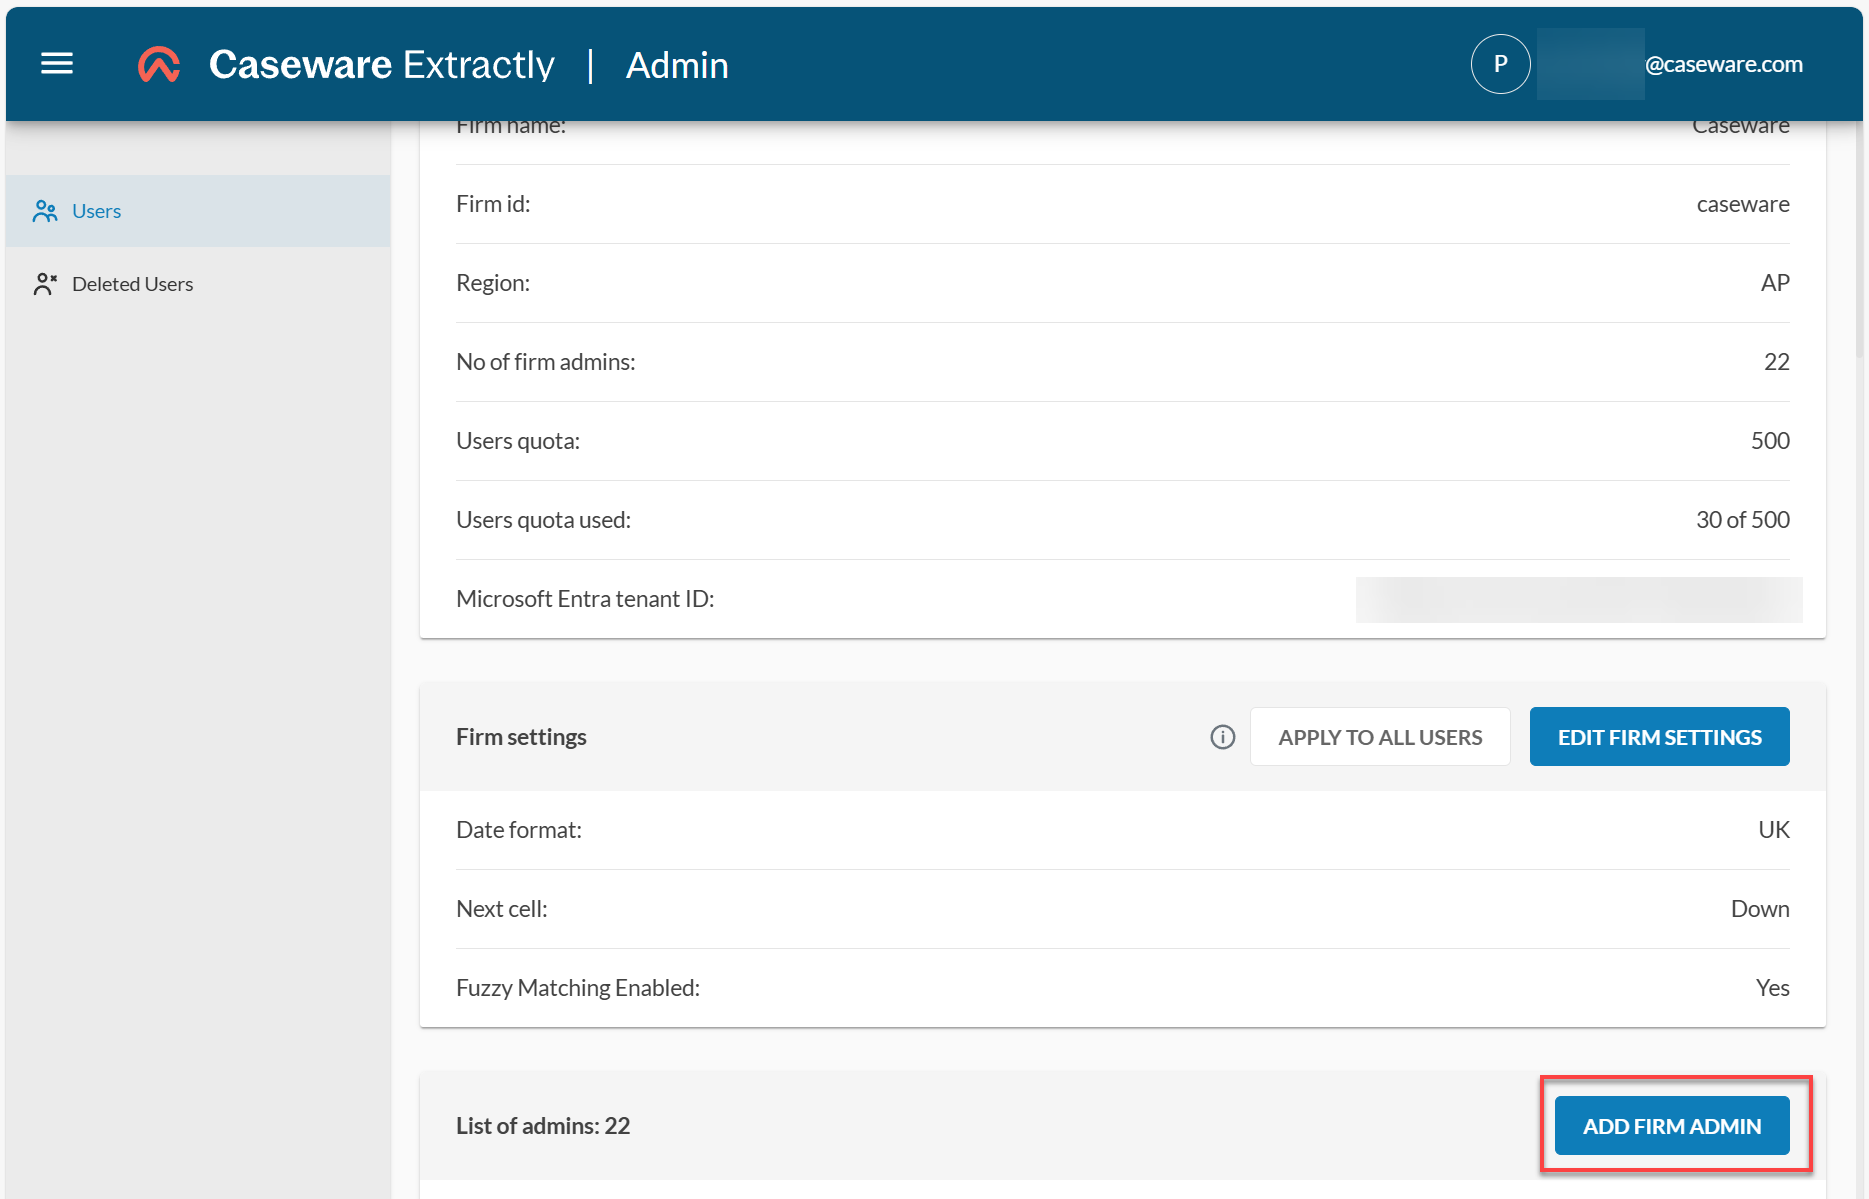
Scroll down to the List of admins section and select ADD FIRM ADMIN.
-
In Email address, specify the user’s email.
-
In Firm ID, the identifying code for your firm appears by default. Leave this default value as it is.
-
In Roles, select
FIRMADMIN. -
Select ADD.
Set up a staff user
Staff users are non-admin users at your firm. They have access to Extractly features but cannot add or remove users.
To add a staff user:
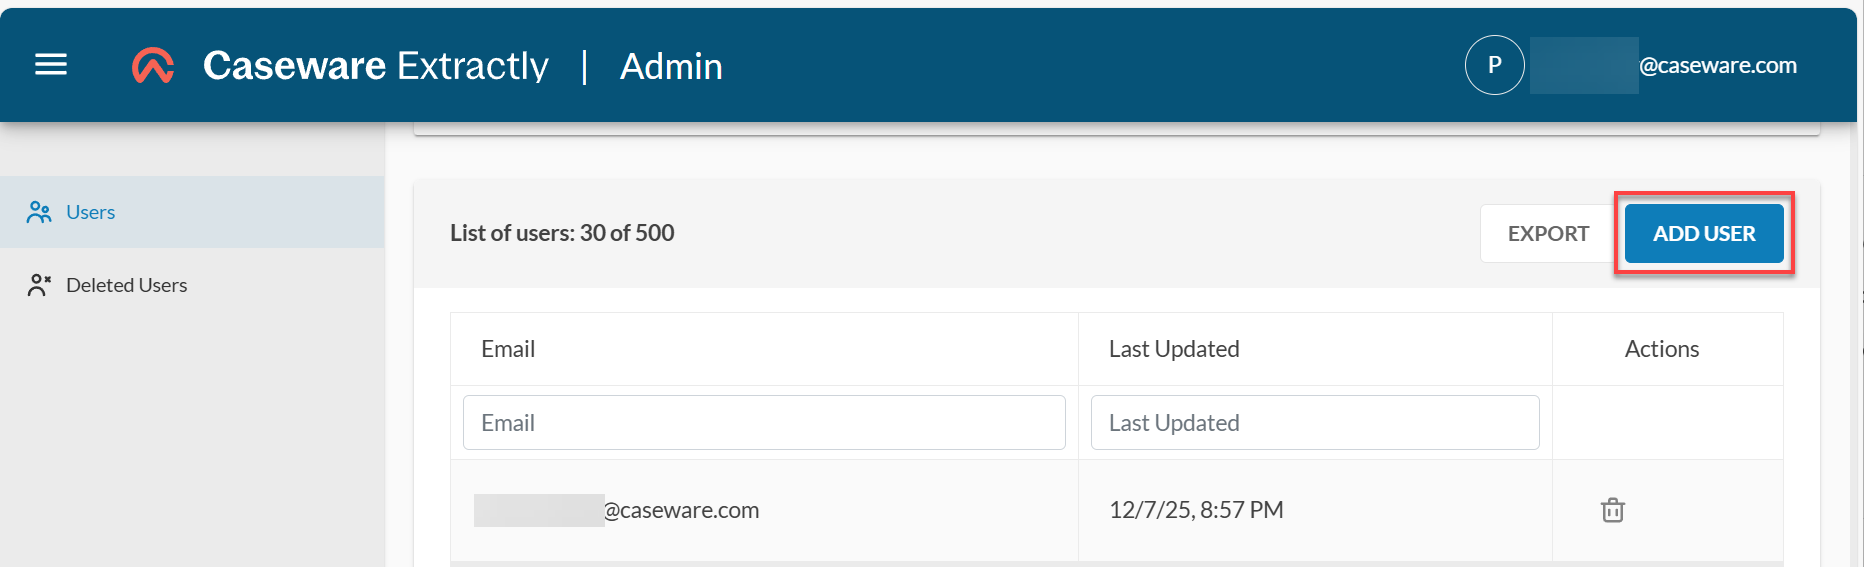
- Go to Users.
- Scroll down to the List of users section and select ADD USER.
- In Email Address, specify the user’s email.
- In Firm ID, the identifying code for your firm appears by default. Leave this default value as it is.
-
In Roles, select
FIRMUSER. -
Select ADD.
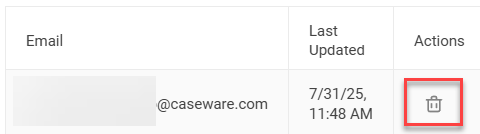
Remove a user
- Go to Users.
- Scroll down to List of users.
- Use the Email filter to find the user you want to remove.
- In the Actions column, select the Delete icon.
Configure firm settings
Set your date format, choose how data fills your worksheets, and enable fuzzy matching for better results.
To configure firm settings:
-
Go Users.
-
Scroll down to the Firm settings section.
-
Select EDIT FIRM SETTINGS.
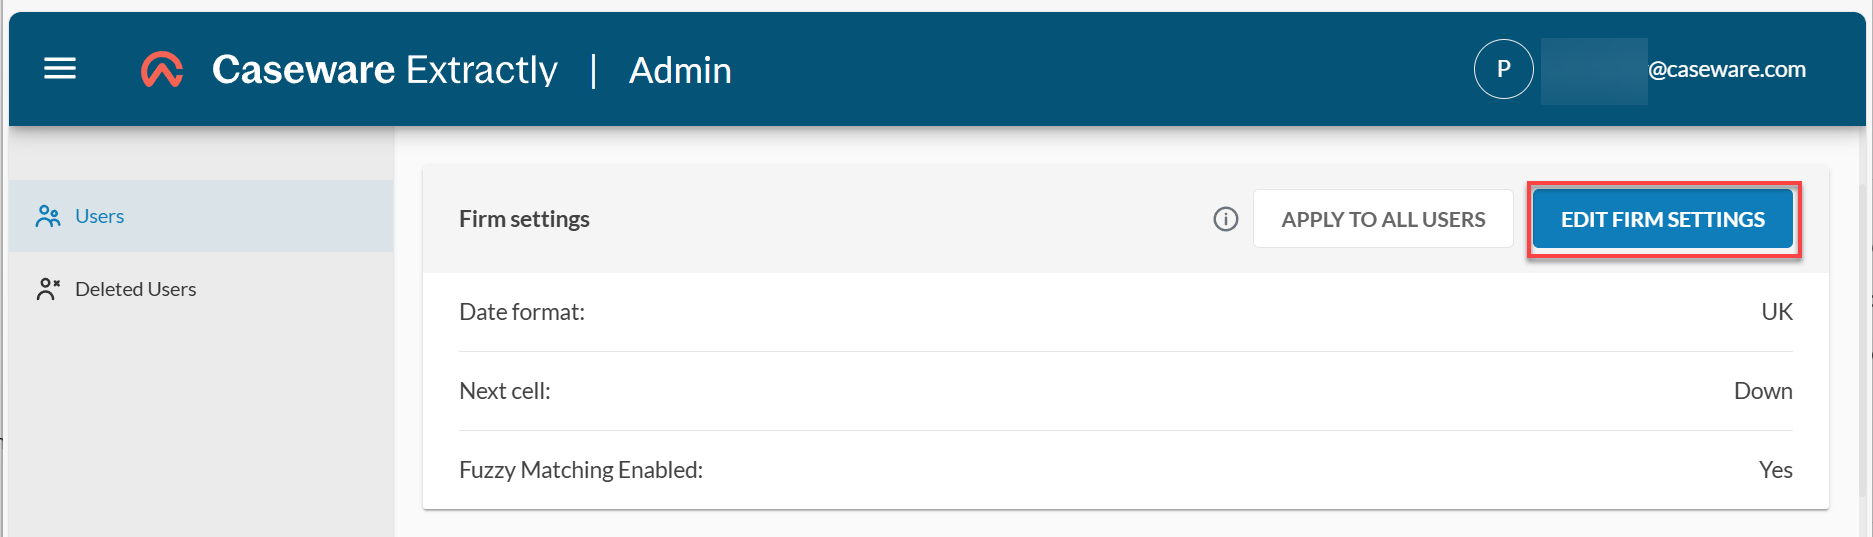
-
Review the following settings and make any changes as needed:
| Setting | Description | Options |
|---|---|---|
| Date format | Controls the format Extractly expects dates to be in when reading or processing data. Because different regions interpret the same written date differently, this setting determines how Extractly should interpret ambiguous values. |
US (MM/DD/YYYY) UK / AU / CA — (DD/MM/YYYY) |
| Next cell | Determines where Excel will move the active cell after Extractly performs an extraction. |
Down: The cursor moves 1 row down from the current cell. Right: The cursor moves 1 column to the right. |
| Fuzzy matching enabled | Determines whether the Fuzzy Matching option appears in Extractly’s data-matching feature. |
Yes: The fuzzy matching toggle is visible to users. No: The fuzzy matching option is hidden. |
-
Select CONFIRM.

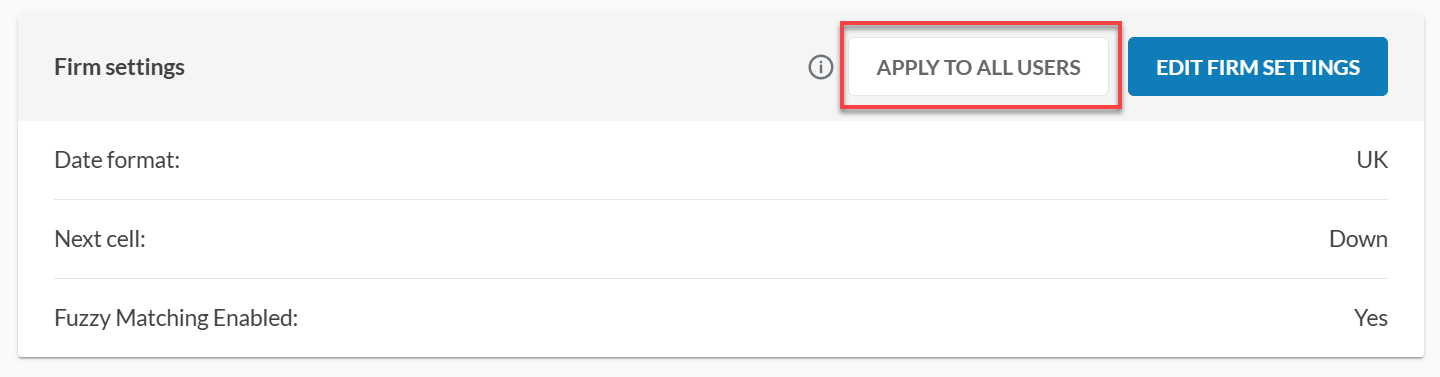
Note: Any changes you make to firm settings are applied to new users only. Select APPLY TO ALL USERS to apply firm settings to existing users.
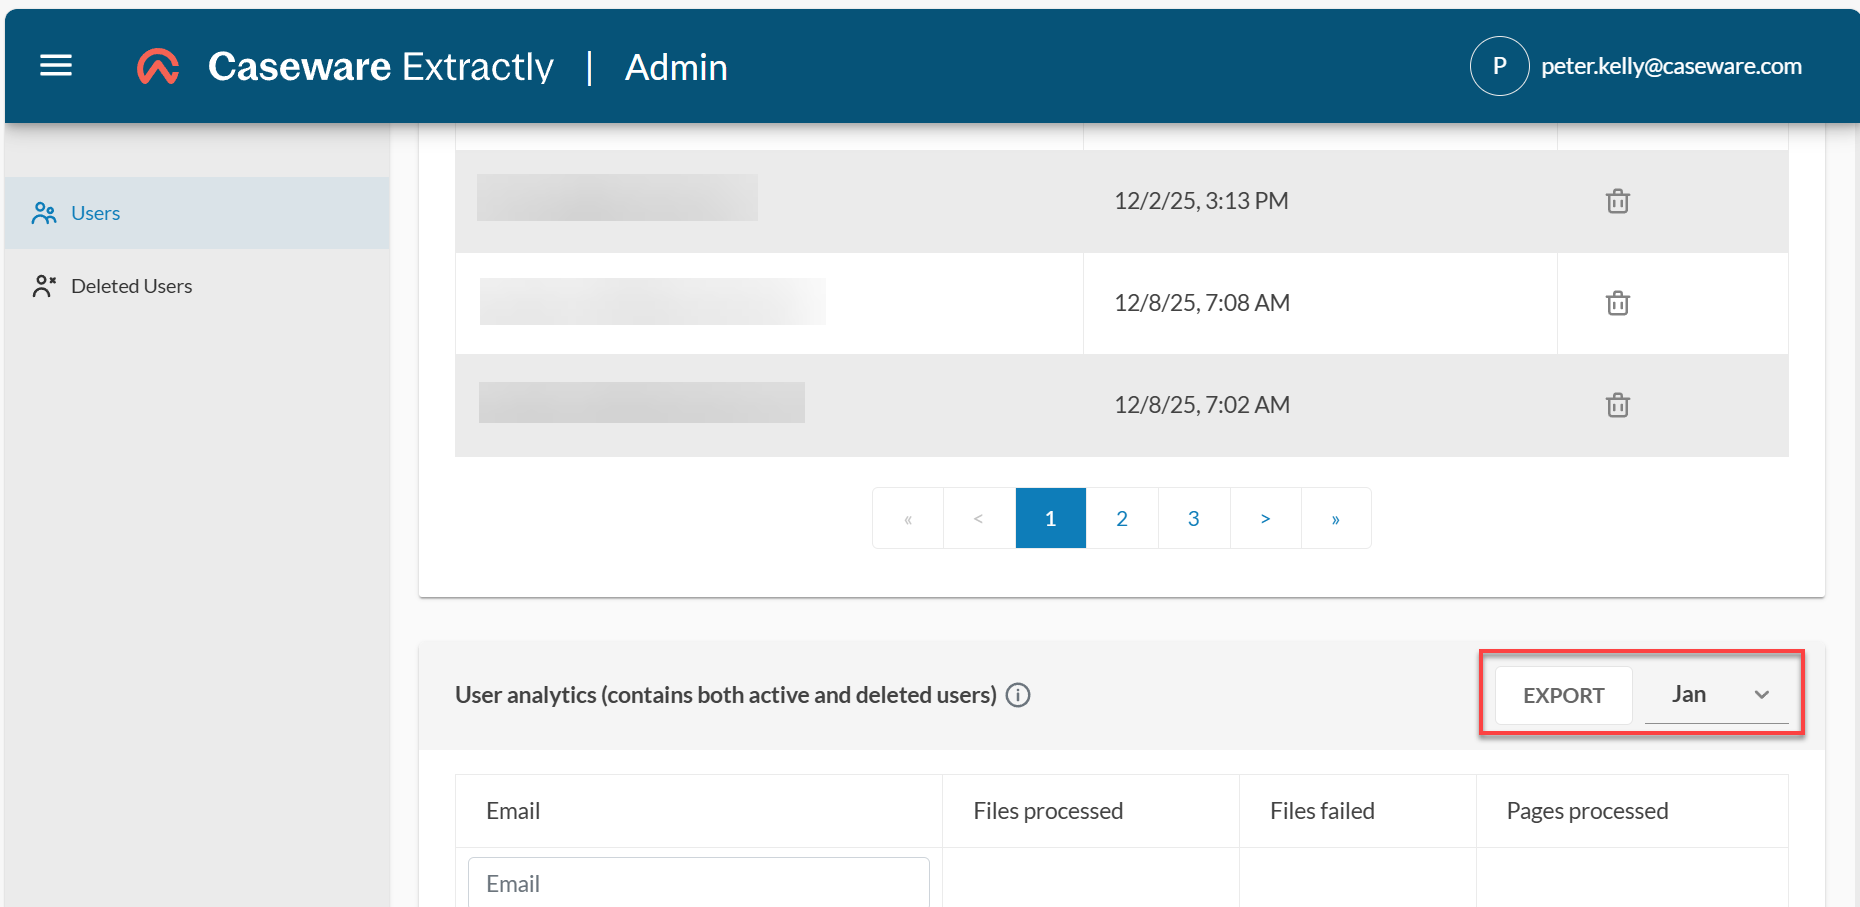
Monitor Extractly analytics and usage
As a Firm Admin, you can monitor key metrics to track Extractly’s usage and performance:
-
Files processed: The total number of files successfully handled by Extractly.
-
Files failed: The number of files that encountered errors during processing.
-
Pages processed: The total number of individual pages extracted and analyzed from uploaded files.
These analytics help you assess system activity, identify issues and optimize Extractly’s usage for your organization.
To view analytics:
-
Go to Users.
-
Scroll down to User analytics.
Export analytics
To export analytics:
- Go to Users.
- Scroll down to User analytics.
- Select a month.
- Select EXPORT. An Excel file is downloaded to your computer.